# Editing wires and viewing alpha in the 3D view
This page documents two editor features: selecting, deleting, swapping and rerouting wires in
the graph editor, and the alpha (transparency) support of the 3D view. Both are clean-room implementations;
every action is an engine command, so the CLI, the control channel and MCP can do the same as the
mouse.
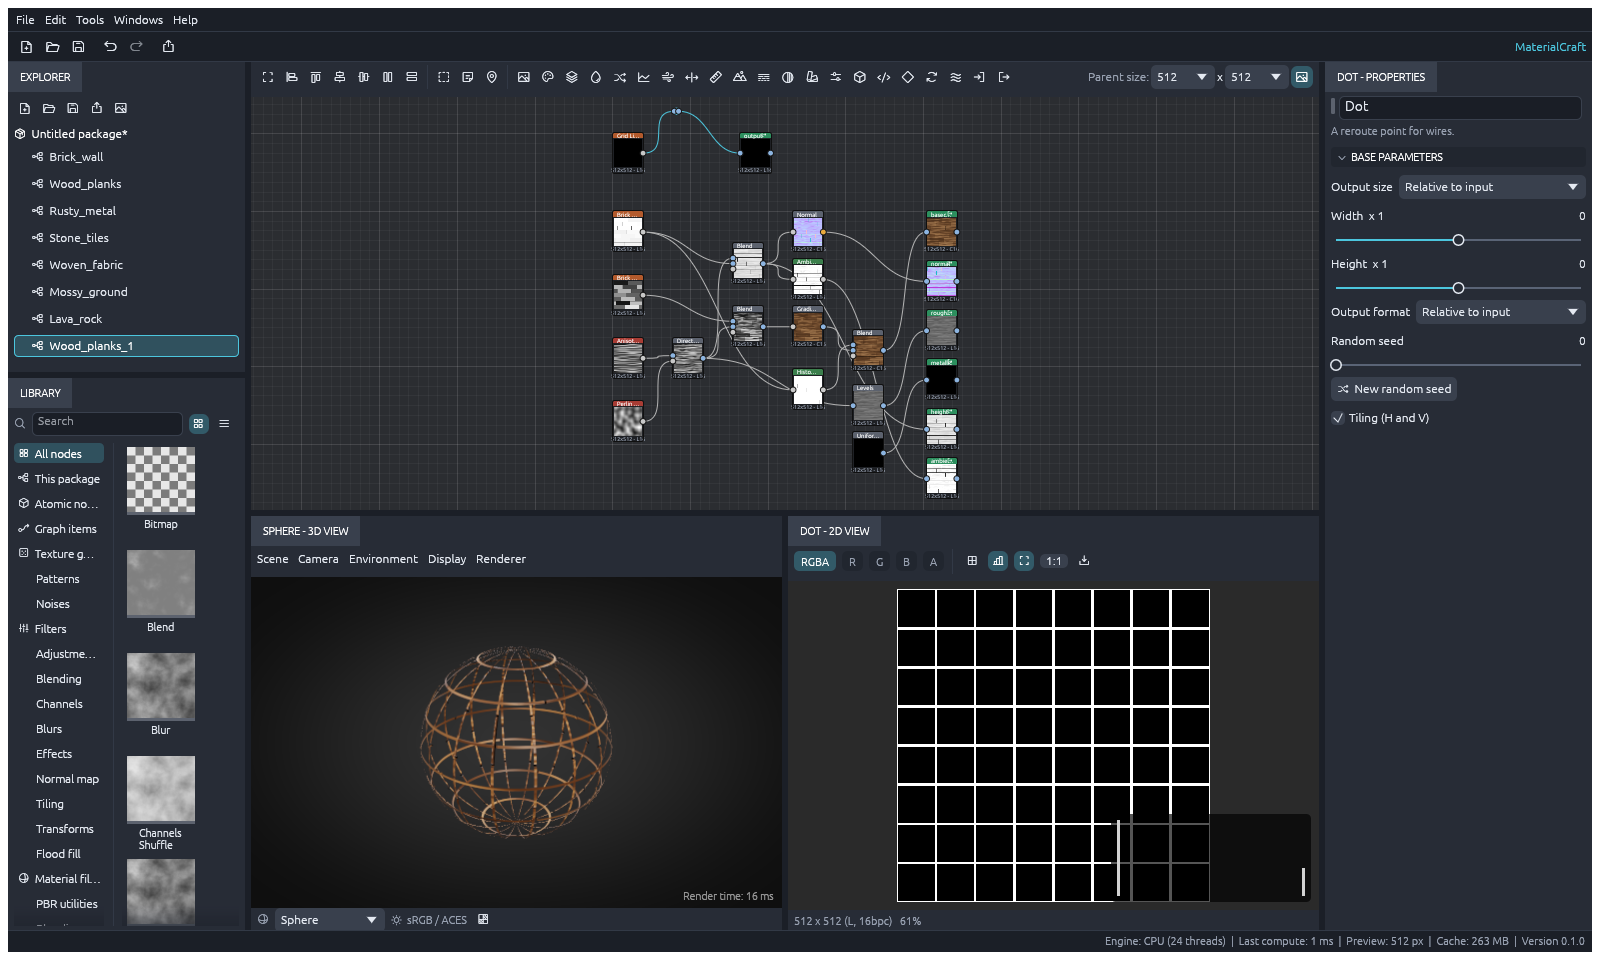
A cut-out material in the 3D view, and a reroute dot pulled out of a wire
## Wires in the graph editor
A wire runs from an output port to an input port. Every input takes at most one wire, so a wire is
named by the input it feeds: the target node and its input port (`to`, `toPort`).
### Gestures
| Gesture | What it does |
|---|---|
| Hover a wire | The wire turns white and the pointer becomes a hand: it can be clicked |
| Click a wire | Selects it alone (drawn thicker, in the accent color); the node selection is cleared |
| **Shift**+click a wire | Adds it to the wire selection |
| **Ctrl**+click a wire | Adds it to the wire selection, or removes it when it is already selected |
| **Delete** or **Backspace** with wires selected | Deletes every selected wire (one undo step) |
| **X** with exactly two wires selected | Swaps where the selected wires come from (see below); they stay selected, so **X** again swaps back |
| Drag a wire | Pulls a reroute **Dot** out of the wire where it was pressed and moves it with the pointer, in one gesture |
| Double-click a wire | Drops a reroute Dot at that point |
| Right-click a wire | Opens the wire menu: **Insert reroute dot**, **Swap selected links (X)** (with exactly two selected), **Delete link** / **Delete selected links**. Right-clicking a wire that is already selected keeps the selection |
| Click anywhere else | Drops the wire selection |
A wire is hit within 5 points of its curve. Node cards, ports and comments sit on top of wires, so
a press there acts on them, not on the wire underneath. Alt+drag and middle-drag still pan the
canvas.
### Swapping wires
Select any two wires and press **X** to swap their sources. On a **Blend** node, select
the *Foreground* and *Background* wires and press **X**: what fed the foreground now feeds the
background and the other way around, so the two layers trade places without rewiring by hand.
- **Two wires** trade sources.
- The action is hidden unless exactly two wires from different output pins are selected.
- Output pin identity determines eligibility; equal values from different pins can still swap.
- In a main graph, both replacement connections must pass the normal image/value input checks.
- The order you click the wires in does not matter, so the result is predictable.
- Wires into different nodes can be swapped too. A swap that would feed a node into itself (a
cycle) is refused with a message, and nothing changes.
- The swap is one undo step.
### Reroute dots
A Dot is the existing `dot` node: one input, one output, passing its input through unchanged. It
lets a wire bend around other nodes. After a dot is inserted it is selected, so it can be dragged,
deleted (**Delete** removes it with both of its wires; **Backspace**, *Delete and relink*, removes
it and joins the wire back up) or given more dots. Inserting a dot is one undo step: **Ctrl+Z**
restores the straight wire.
### Commands
| Command | Params | Result |
|---|---|---|
| `graph.wire.insertDot` | `{to, toPort, at?: [x, y]}` | Splits the wire feeding `to.toPort` with a Dot centered at `at` (graph space; default: midway between the two nodes). Returns `{"id": }` and selects the dot. Errors when no wire feeds that input. |
| `graph.wire.swap` | `{wires: [{to, toPort}, ...]}` | Exchanges the sources of exactly two listed wires. Returns `{"swapped": 2}`. Rejects a count other than two, repeated or missing wires, wires from the same output pin, incompatible input types, and cycles; nothing changes then. |
| `graph.wire.delete` | `{wires: [{to, toPort}, ...]}` | Deletes the listed wires in one undo step (what the Delete key and the menu run). Returns `{"deleted": n}`. |
| `graph.disconnect` | `{to, toPort}` | Deletes the single wire feeding `to.toPort`. |
Over the control channel (see [control-protocol.md](control-protocol.md)), splitting the wire
feeding node 12's `input` with a dot at (240, 80), then deleting the wire from the dot to node 12:
```json
{"id": 1, "method": "command.run", "params": {"id": "graph.wire.insertDot", "params": {"to": 12, "toPort": "input", "at": [240, 80]}}}
{"id": 2, "method": "command.run", "params": {"id": "graph.disconnect", "params": {"to": 12, "toPort": "input"}}}
```
Swapping the two layers of Blend node 7:
```json
{"id": 3, "method": "command.run", "params": {"id": "graph.wire.swap", "params": {"wires": [{"to": 7, "toPort": "foreground"}, {"to": 7, "toPort": "background"}]}}}
```
`session.inspect` lists every wire under `graph.connections` and the dot under `graph.nodes`
(`"def": "dot"`). The wire selection itself is editor state, like hover, and is not part of the
session.
## Alpha in the 3D view
The 3D view reads OpenGL normal maps by default, matching the Normal node's default format.
For a DirectX normal map, enable **Display ▸ Flip normal map Y (DirectX)**, or run
`view.3d {"normalYFlip": true}`. Choose the corresponding format in the Normal node's properties.
The setting affects both the interactive view and headless renders, appears as `view3d.normalYFlip`
in `session.inspect`, and returns to OpenGL when the scene is reset.

The alpha channel view: white is opaque, black is clear
### Where the alpha comes from
1. The output with the **Opacity** usage, read as grayscale, when the graph has one.
2. Otherwise the alpha channel of the **Base color** output, when it is a color image.
3. Otherwise the material is opaque.
### Transparency
Where the alpha is below one, the surface lets light through: each camera ray composites the
surfaces it meets front to back (`color × alpha`, the rest passes on) through up to eight layers,
then shows what lies behind: the backdrop, or the environment when **Display ▸ Environment
background** is on. Back faces seen through a clear front are shaded facing the viewer, so a
cut-out sphere shows its inside. Every layer is the mesh as the height output displaced it.
**Display ▸ Transparency (alpha)** turns this off, so the alpha is ignored and the mesh is opaque.
It is on by default.
Before this change, the opacity output only mixed each pixel with the flat backdrop color; the
back of the mesh and the environment never showed through.
### Alpha channel view
**Display ▸ Show alpha channel**, or the checkerboard button in the 3D view's bottom bar, shows the
alpha on the mesh unlit: white is opaque, black is clear, values in between are linear (0.5 shows
as 50% gray, without tone mapping). The view is labeled *Alpha channel* in its top-left corner.
It shows the first surface only, so the channel reads clearly.
### Commands
`view.3d` takes two booleans; both are part of the session's `view3d` state and of
`session.inspect`:
| Param | Default | Meaning |
|---|---|---|
| `transparency` | `true` | See through the mesh where the alpha is below one |
| `alphaView` | `false` | Show the alpha channel instead of the lit material |
```json
{"id": 4, "method": "command.run", "params": {"id": "view.3d", "params": {"alphaView": true}}}
```
Headless renders (`materialcraft-cli render`, the `render` RPC) use the same settings.
## Implementation notes
- `crates/render/src/preview.rs`: `alpha()` picks the alpha source; `shade()` returns color, alpha
and hit distance; `trace()` composites the layers (`MAX_LAYERS = 8`, stops once less than 0.1%
of the light gets through); `Settings::{transparency, alpha_view}`.
- `crates/engine/src/wire_cmds.rs`: `graph.wire.insertDot`, `graph.wire.swap` (unplugs every
listed wire first, then reconnects, so a half-swapped state is never mistaken for a cycle) and
`graph.wire.delete`.
- `crates/ui-egui/src/graph_view.rs`: wire hit testing (`bezier_points`, `bezier_at`,
`bezier_distance`, `wire_at`), the `WirePress` gesture, the multi-wire selection
(`GraphView::selected_wires`), the wire menu, `delete_selected_wires` and
`swap_selected_wires`; `crates/ui-egui/src/menus.rs` gives Delete, Backspace and X to selected
wires before the node commands and shortcuts.
- `crates/ui-egui/src/view3d.rs`: the Display menu toggles and the bottom-bar button.
## Tests
- `preview::tests::alpha_shows_what_lies_behind_and_the_alpha_view_shows_the_channel`: a clear
sphere shows the backdrop, transparency off ignores alpha, the opacity output wins over the base
color alpha, the alpha view shows exact values.
- `a_wire_splits_with_a_reroute_dot_and_deletes` (engine): insertion, wiring, selection, cooking
through the dot, single-step undo, the error with no wire, deletion.
- `selected_wires_swap_their_sources_and_delete_together` (engine): two-wire swap in any order,
single-step undo, refused requests (one or three wires, duplicates, missing wires),
a refused cycle that leaves the graph unchanged, deleting several wires in one step.
- `graph_view::tests::clicked_wires_swap_with_x_and_delete_together`: real clicks on a Blend
node's two wires (the second with Shift), X swaps, X again swaps back, Delete removes both.
- `every_template_is_opaque_in_the_3d_view` (engine): no built-in template turns see-through.
- `graph_view::tests::wires_are_hit_near_their_curve_only`: wire hit testing.
- The `snapshots` UI test renders both screenshots on this page (`alpha-transparency`,
`alpha-channel`).